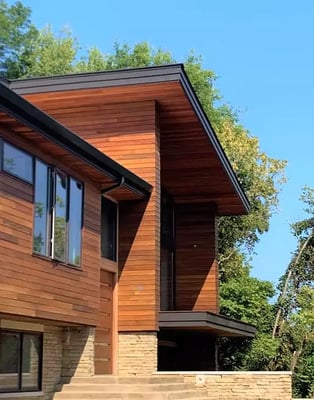

One of the first things a rain screen installer has to consider before starting the rain screen installation work is “How will I treat the window and door openings?” Depending on how far off the exterior wall, the siding projects, there are options for how to treat this rain screen detail. For window trim that projects out further than the face of the siding, many architects, designers and builders choose to run the siding directly to the trim. If the face of the rain screen siding projects out further than the exterior window trim, you may want to consider a picture frame type of design to define the window opening.

To maintain a weather-tight building exterior and thermal envelope, it is essential to first install and flash the doors and windows according to the door or window manufacturer’s specifications and installation guidelines. If specific flashing details and installation guidelines are not provided by the door or window manufacturer, standard building practices following all building codes should be employed.
When using the Climate-Shield Rain Screen System, a 3/4” wall cavity is created behind the siding. In a typical rain screen installation using plywood or OSB structural sheathing, if you add the depth of the wall cavity plus the thickness of the wood cladding for your rainscreen, that will give you the total distance the face of your siding will project from the building. For example ¾” siding plus the ¾” wall cavity equals 1-1/2” total projection off the exterior sheathing. If your window trim projects more than 1-1/2”, most builders and designers will allow the wood cladding to run up to the window and door openings, without any additional trim.

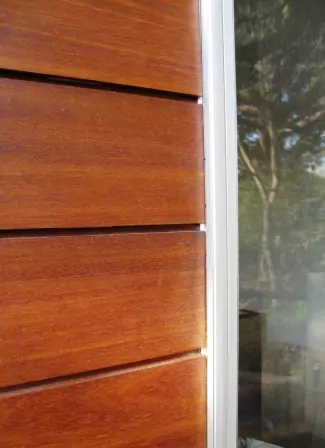
If your window or door trim does not project out as far from the building envelope as your siding, the siding will stand proud of the window and door openings. For example, if the trim of your door or window projects out 1-1/4” from the exterior sheathing and your siding projects out 1-3/4”, this 1/2" difference will be revealed at every door and window opening. Since you do not want to leave the unprotected and exposed ends of your rain screen cladding where it meets your window and door openings, you will have a decision to make. Many designers and builders often choose to either add larger trim to the door or window, using the window or door manufacturer’s trim options or build a “picture frame” around their door and window openings.
Building an effective picture frame to complement your wood rain screen siding can be made in the shop or on site. While there are many ways to achieve the same result, most picture frames for doors and windows are built in a very similar fashion:
1.) Use a ‘furring’ material of ¾” thickness or less for the flange on the back of your picture frame. This flange piece will serve as your nailer to the exterior sheathing. Making this piece about 2” or 2-1/2” in width will leave you adequate width to fasten this piece to the building exterior after you fasten your trim to it. For best long term results, you will want to make this flange from a long lasting material such as high density hardwood or marine grade plywood.

2.) To make your picture frame, choose a wood species to match your rain screen cladding and then rip the lengths with a saw to the proper size to match the projection of your siding.
3.) To attach your picture frame trim to the flange, you will want to pre-drill though the back of the flange into your picture frame trim. Then fasten this assembly together using stainless steel screws. By pre-drilling and fastening this assembly together from behind, you will not see the screws on the front of the picture frame trim.

4.) Fasten this entire assembly to the exterior sheathing around your doors and windows before installing your siding.
Please visit our website for additional information about rain screen installation, rain screen architectural details, rain screen cladding options, rain screen systems and more by following any of the links below:
Climate-Shield Rain Screen System
Rain Screen Installation Guidelines
Architectural Rain Screen Details
REQUEST A FREE RAIN SCREEN QUOTE
For a comprehensive introductory guidebook for rain screen systems, please download, "The Ultimate Guide to Building Green with Rain Screen Wood Siding". Download your FREE Rain Screen Guide today.


Related Posts