
WOOD RAIN SCREEN CORNERS
Wood Outside Corner Assembly and Installation Options
Regardless of your preference for vertical or horizontal wood outside corners for your wood rain screen design, Climate-Shield offers beautiful real wood outside corners to meet your design and construction needs, with options to meet your project budget.
Wood rain screen outside corner options include both vertical and horizontal corners. Because traditional vertical wood corners are fairly common, and lower cost, let's start there.

Climate-Shield® Vertical Wood Rainscreen Outside Corners
"If you enjoy the traditional look of a vertical outside corner for your wood rain screen siding system, here's a step by step primer to help save you time when you build, assemble and install them on site."
How to Assemble and Install: Vertical Wood Rain Screen Outside Corners
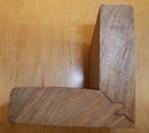 Step One: Select the appropriate wood species and size for your wood corners. Here we are showing 5/4 x 4 Ipe wood rainscreen outside corners. We will miter them for you to a lock-joint miter profile. Notice there are left and right piece components to complete the vertical outside corner. If you are building your rain screen corners on site, we will ship these pieces to you loose.
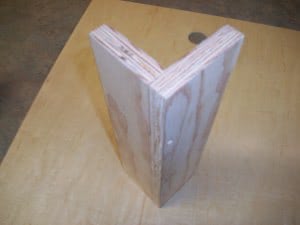
Step Two: Because the Climate-Shield rain screen system creates a uniform ¾” wall cavity, you will want to use ¾” plywood flanges for the backer. Rip ¾” marine grade plywood into 8’ strips to make a fastening flange to attach to the back of the outside mitered corner assembly. We have found that ripping one piece of plywood to 2-3/4” width and the other piece to 3-1/2” width will leave you an approximate 1” flange when using nominal 4” wood corner material.
Step Three: Once the two widths of plywood have been ripped, fasten them together using stainless steel screws for longer life.
Step Four: Pre-drill the plywood every 12” using a countersinking bit to accommodate the head of the stainless steel screw.
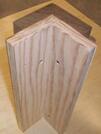 Step Five: If you are planning to use flashing or building wrap to protect the plywood, now is the best time to do so. Clamp your wood outside corner pieces to the plywood corner assembly. Now you are ready to predrill the back of the wood corner.
Step Six: Option A If you have chosen not to use epoxy, you may now fasten the wood rain screen corners with 1-1/4” stainless steel screws through the back of the plywood.
Step Six: Option B If you have decided to use epoxy, remove the clamps and carefully apply a small amount of epoxy to the lock joint miter corners. “Butter” the back of the wood corners with epoxy as well. Now you can re-clamp the assembly back together and fasten the wood outside corners with 1-1/4” stainless steel screws through the back of the plywood. Allow the epoxy to cure for the recommended amount of time before removing the clamps.
 Step Seven: Using 80 grit sandpaper, clean up any imperfections in the surface of the wood, or any irregularities in the corner or any excess glue. For best results and appearance, it is recommended to clean and wipe the corner assembly down and apply a UV inhibiting sealer to the wood before installation. (For best results, always follow the finish manufacturer's instructions.)
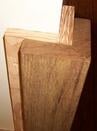
Step Eight: Install your wood rain screen corner assembly to the outside corner of the structure using the appropriate screws or fasteners.

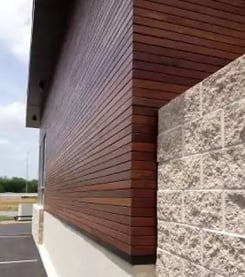
Horizontal Wood Rain Screen Outside Corners for the Climate-Shield Rain Screen System
 Horizontal Wood Outside Corner Options
 Horizontal Wood Outside Corner Options
We understand that many architects and design professional love the look of a horizontal outside corner with their wood rain screen designs. Here's a few things you should know. Due to the nature of wood, especially in an exterior environment, this outside corner design method requires careful planning and expert installation. Because of the nature of wood, and the exposed end grains of the siding, designing a horizontal wood outside corner can be a little tricky.
The end grain of exterior wood is absolutely the most vulnerable part of a wood siding board. This is the part of the board where ‘wicking' and rapid loss of moisture can occur. While any part of a wood siding board can move over time, the end grain is more prone to end-checking and natural wood movement, especially when a 45° miter is required. Because of these natural characteristics and behavior of exterior wood, Climate-Shield has tested and developed a better design and build solution for this type of horizontal outside corner detail.
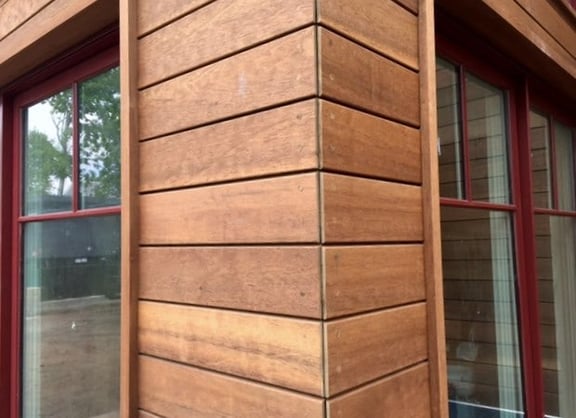
Climate-Shield Horizontal Outside Corner
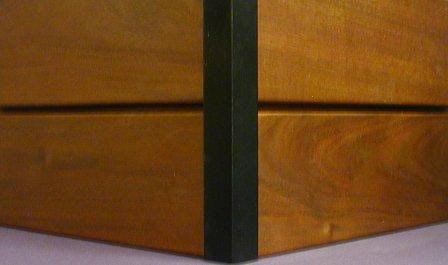
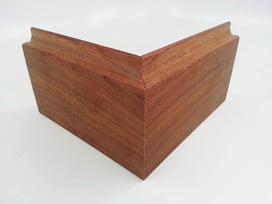
Climate-Shield has developed a high performance outside corner for horizontal wood rain screen installations. After testing this joint for the past several years in tough weather in actual field conditions, we have found that this miter joint performs exceptionally well with hardwood siding. Although this method still has a 45° miter on the end grain of the siding, the dovetail miter and key hold the joint together remarkably well, which helps provide better protection for the end grain of the siding.
The Climate-Shield Horizontal Outside Corner is prefabricated for quick assembly on site. Not only will this corner system perform better than field built mitered corners over time, we have found the additional cost of this detail is quickly offset by reduced labor costs from not having to miter, end seal, pre-drill, screw and plug field mitered outside corner assemblies.
Watch this brief video to see the corner assembly in action:
DOWNLOAD CLIMATE-SHIELD HORIZONTAL OUTSIDE CORNER BROCHURE
DOWNLOAD HORIZONTAL OUTSIDE CORNER ASSEMBLY GUIDELINES
Other Wood Rainscreen Corner Options
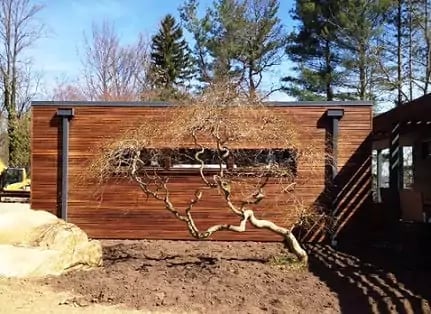
Horizontal Quirk Miter Outside Corner Field Assembly
Some designers will use a quirk-miter detail to help minimize the natural impact and exposure of the end grain of the wood siding. Experienced contractors will also end seal the cut ends quickly to minimize end checking and potential splits. Face screwing is required in this assembly to help the wood remain in place during the critical acclimation period and seasonally thereafter. Trim head screws may be used to limit the appearance of the screw head at the corners. Countersinking and plugging the screw heads with the matching wood siding species is another option.
 Although the ends of the siding boards are most vulnerable to weathering and some movement, particularly cupping, the screws help hold the boards in place more effectively and tend to minimize the amount of natural wood movement.
With the best design intent and construction practices this method should perform reasonably well over time. Depending on the amount of exposure, site conditions and prevailing weather conditions, 'popped’ wood plugs or repairing an occasional corner piece due to natural wood movement may be required if needed.
