

Installing wood siding in some type of a rainscreen design has become the design and construction standard – not the exception. Thank goodness. Gone are the days of black mold rotting the siding right off your home. There are some simple and effective methods for creating a high-performance wood rainscreen system.
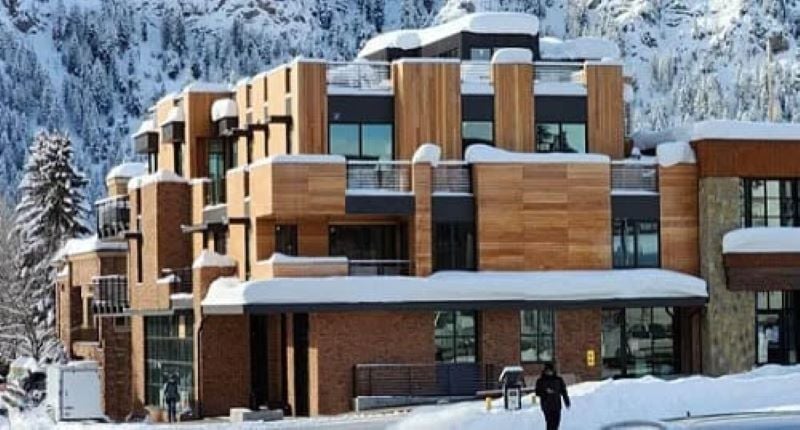
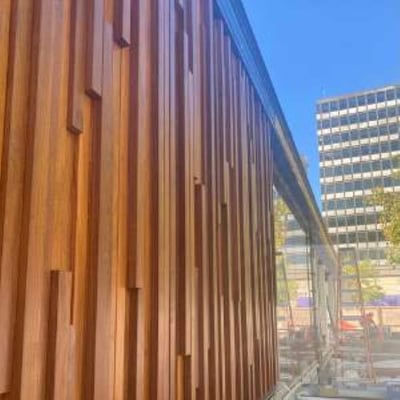
Garapa wood rainscreen system design, horizontal and vertical installation in Sun Valley, Idaho
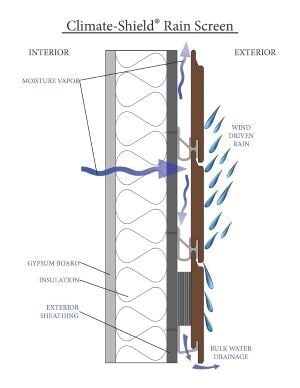
What Makes it a Wood Rainscreen?
Wood siding is spaced off the building envelope to create a wall cavity behind the siding. This is often called a rainscreen gap. A rainscreen is not a single thing – it’s a system. It’s a combination of a tight building envelope, a rainscreen gap to manage moisture, and wood siding. How you design and install the rainscreen is the key to success.
- The exterior wood siding is the outermost layer of a rainscreen system. It’s the face of the building and adds natural beauty. It is also the first line of defense against the elements. In a well-designed wood rainscreen, most of the bulk water is deflected. Any water that gets past the wood cladding ends up in the wall cavity.
- The wall cavity (or rainscreen gap) should be designed so that any bulk water that gets in to drain out the bottom of the system. Any humidity should also have a means of egress, too. Ventilation at the top of the wall cavity works best.
- The weather resistive barrier is the final line of protection from exterior weather elements. It cannot be overstated how important it is to install the wrap tightly, with no gaps or voids.
RELATED: DOWNLOAD THE ULTIMATE GUIDE TO BUILDING GREEN WITH WOOD RAINSCREEN SIDING
Importance of Selecting the Right Weather Resistive Barrier
Water is the biggest enemy of wood, especially exterior wood. As the old saying goes, “Proper prior planning prevents poor performance”. Selecting a high-performance house wrap before you start the installation is the first critical decision for any wood rainscreen system design. Installing it properly is the next critical step.
When creating a rainscreen, some people think – erroneously – that the siding will keep out all the water. This is not true, especially with an open joint rainscreen system. The function of the siding in a rainscreen is to keep the bulk water out. If water does enter the rainscreen cavity, it needs a method to allow the water or vapor to escape, and to dry out quickly. A weather resistive barrier is more important now than ever before.
Common Types of Wood Rainscreen Systems
There are four common types of wood rainscreen systems for residential design and construction with plywood or OSB for exterior sheathing. The first two (drainable house wrap and the mesh style rainscreen) work great for shingles, shakes and clapboard. The next two methods (furring strip and advanced rainscreen clips) work best for wood siding boards.
Drainable House Wrap Method
This rainscreen method works great for shingles and clapboards. This method saves time and labor because the rainscreen gap is built into the house wrap. There are several products on the market to choose from.
Pros
- Works well with Shingle and Clapboard
- Eliminates the rainscreen gap installation step because it is built into the weather resistive barrier
- Easy to install
- Effective
- Protects the building envelope (your home)
- Creates a (minimal) rainscreen gap (about 1/8” space)
Cons
- A small rainscreen gap is not as effective as a larger wall cavity
- The smaller the rainscreen gap – the slower the drying process - and the higher the potential for rot and decay.
RELATED: DOWNLOAD THE ULTIMATE GUIDE TO BUILDING GREEN WITH WOOD RAINSCREEN SIDING
House Wrap and Mesh Spacer Rainscreen Method
This rainscreen method also works well for shingles and clapboards. The house wrap is installed first, then the mesh rainscreen spacer is placed over it to create the rainscreen gap. Next, the wood siding is installed.
Pros
- Works well with shingles and clapboards
- Fairly easy to install
- Protects the building envelope (your home)
- Creates a larger rainscreen gap, usually around ¼” space, depending on your selection of rainscreen fabric
Cons
- Three step installation process
- Smaller rainscreen gaps are not as effective as larger wall cavities
- The smaller the rainscreen gap – the slower the drying process- and the higher the potential for rot and decay.
Furring Strip Rainscreen Method
The furring strip rainscreen method works well for clapboards, siding boards and T&G (tongue and groove) siding. The house wrap (weather resistive barrier) is installed first, then the furring strips are installed to create the rainscreen gap. Then the siding is installed.
Pros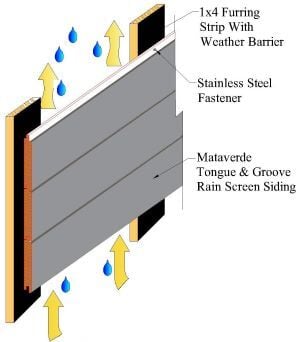
- Works well with T&G wood siding boards
- Creates a larger ¾” rainscreen gap for better ventilation
- 3/4" is the ideal wall cavity depth for best rainscreen performance
- Faster dry-out time
Cons
- More labor intensive (three step process)
- The furring strips are vulnerable to rotting.
- Best practice is to cover the furring strips with weather resistive tape.
- The total system depth (¾” rainscreen gap and ¾” siding thickness) may require additional trim around door and window openings if the window flanges are less than 1-1/2” depth.
RELATED: DOWNLOAD THE ULTIMATE GUIDE TO BUILDING GREEN WITH WOOD RAINSCREEN SIDING
Advanced Rainscreen Clip System (Climate-Shield)
This rainscreen method is considered the most effective system for residential homes (and commercial structures) that use plywood or OSB for exterior sheathing. It is ideal for nearly all wood siding species. The boards are milled to the correct profile for trouble-free, quick installation. As this is an “open joint” rainscreen system, selecting a high-quality WRB is crucial for long term performance.
Pros
- Ideal for 1x4, 1x6 and 5/4x6 wood siding boards
- Creates a larger ¾” rainscreen gap, which is considered ideal by building scientists.
- Fastest dry-out time
- Superior moisture management
- Requires no furring strips
- Labor saving (two step process)
- The clips automatically create a ¾” rainscreen gap, so you are installing the rainscreen system while you are hanging the siding
- Minimal material waste
- Components are covered by a warranty
- Install siding vertically, horizontally or diagonally, easily and effectively
Cons
- A high-quality weather resistive barrier is a must for best performance
- The total system depth (¾” rainscreen gap and ¾” siding thickness) may require additional trim around door and window openings if the window flanges are less than 1-1/2” depth.
Wood Siding Board Options
If you love the look and feel of real wood siding boards, we have a wide range of gorgeous siding options to consider. They can be milled to T&G (Tongue and Groove) or the Climate-Shield rainscreen siding profile depending on your design and installation preference.

Arbor Wood American Ash cladding
Arbor Wood Thermowood thermally modified cladding is available in American White Ash, Poplar and Southern Yellow pine wood species, several cladding sizes, profiles and many different architectural finishes.

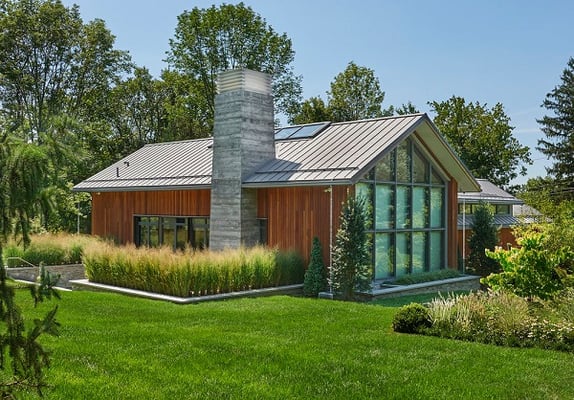
Mataverde Machiche hardwood cladding in Climate-Shield rainscreen design
Mataverde high density hardwood cladding species like Jatoba, Machiche, Garapa and Ipe are long lasting and can enhance your design beautifully.

Mataverde SaferWood ignition resistant real wood cladding
If you are in a high fire zone, consider Mataverde SaferWood ignition resistant real wood siding for your project.
RELATED: DOWNLOAD THE ULTIMATE GUIDE TO BUILDING GREEN WITH WOOD RAINSCREEN SIDING


Related Posts